Registration and Application
Due April 18, 2025
All UCSB undergraduates who conducted research in the past Academic year are invited to apply for Colloquium.
Groups should submit only one application per poster they intend to display.
Students must apply by April 18, 2024. URCA Grant recipients are only guaranteed a spot if they submit the form by the April 18 deadline.
Event Details
Date: Wednesday, May 14th, 2025
Due to an overwhelming interest and growth in undergraduate research at UCSB, we have split the Colloquium into two separate sessions. Students will be assigned according to the major listed in their application.
Session A: Life and Psychological Sciences
9:30 AM - 11:30 AM
This session will feature students in Psychological and Brain Sciences and those in the Biological Sciences.
Session B: Technology, Society, and Culture
12:00 PM - 2:00 PM
This session will be for students in the Social Sciences, Humanities and Fine Arts, Engineering, Maths, and Physical Sciences.
Poster Guidelines
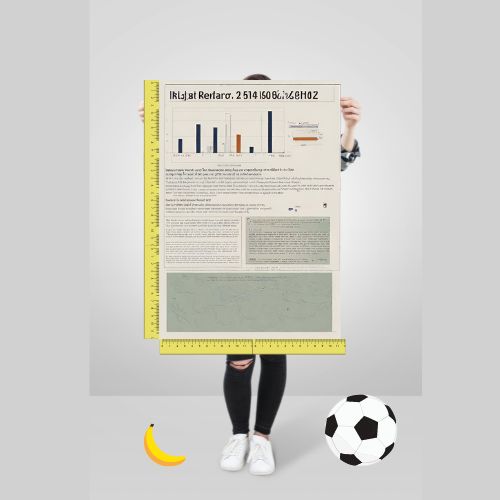
Posters must be 2 ft. wide and 3 ft. tall. (24” x 36” portrait or 7200 x 10800 pixels). All page sizes should be set to 2x3 feet as the very first step of setting up your poster file. The minimum resolution for posters is 200 dpi, though 300 dpi is preferred.
If your project requires additional space allocation or a table, you must have this approved by the URCA Office before April 14.
Poster Printing
URCA Grant recipients who elected at the time of application to earmark funds for poster printing will be contacted directly to submit poster files. Poster PDFs must be submitted by May 8 to the unique link sent to recipients.
Printing lead times vary, but SBPrinter.com will offer the best rates to students who submit by the end of business on Thursday, May 8.
Event Structure and Procedures
Event day Set-Up
If you independently had your poster printed:
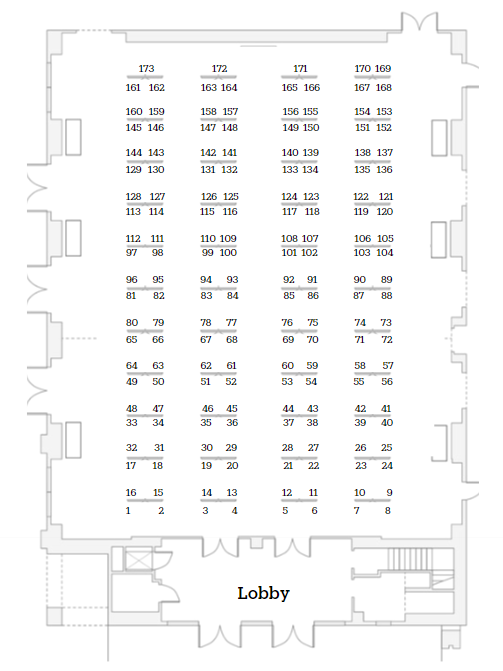
1. Bring your 24x36 poster to Corwin Pavilion in the half hour before your assigned session
2. Check the program for your assigned spot
3. Take four pushpins from one of the tables and secure the poster to your assigned spot.
If you had your poster funded and printed through the URCA Office, we will retrieve and set it up on your behalf, all you have to do is show up for the event.
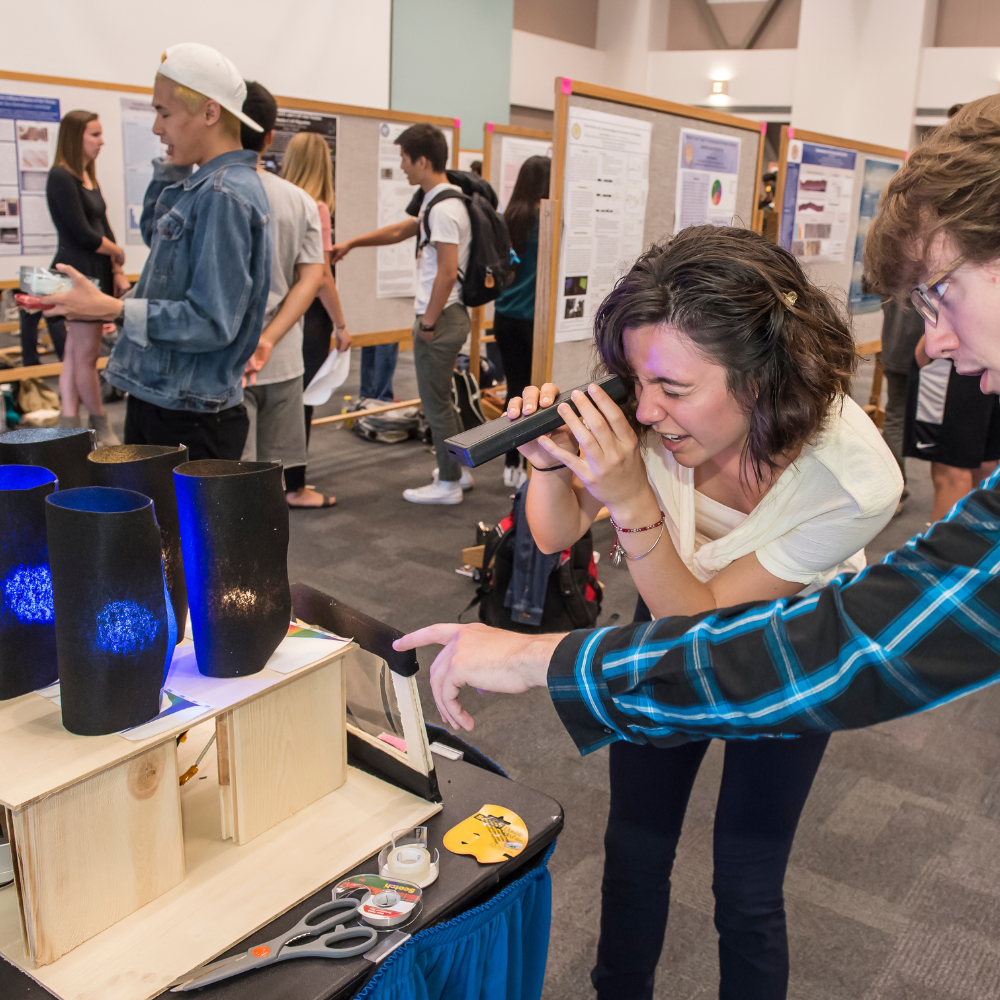
Colloquium
Students who are available at this time are asked to stay by their posters to discuss their research with guests. It might help you to practice a 30-second elevator pitch that you can use to explain what your research is about.
There is no dress code, but many students prefer to dress in professional or business casual attire according to the norms of their discipline.
Students may take their posters down at the conclusion of their session. Posters left behind can be picked up at the URCA Office in the Library during office hours for the remainder of the quarter. Posters that are not picked up by the end of the quarter will be considered property of the URCA Office and may be destroyed or used for instructional purposes.
Poster Creation and Presentation Resources
NOTE
Before submitting your poster for printing, be sure to check in with your mentors and collaborators to confirm that the content is approved for sharing.
We love learning about all the amazing research students are participating in but your advisors may not be ready to share parts of your project yet. We highly recommend discussing elements of your poster with your mentor first to make sure you’re all on the same page regarding what your presentation will/can cover!
Resources to Make Your Poster and General Advice
BioRender: Free, Easy to Customize and Format Poster Building Tool
General Advice for poster design
UCSB poster templates in PowerPoint
Understanding Your Audience
Adapt your content based on your audience—whether they are general attendees, interdisciplinary researchers, or experts in your field. If you won’t always be available to explain your work, make sure the poster is clear and self-explanatory with key findings and conclusions highlighted.
Pro Tip: Consider limiting your use of discipline specific jargon and generalize your processes so individuals can follow regardless of their background.
Presenting Your Poster
- Practice: Prepare a 1-minute summary (elevator pitch style), a 3-minute overview, and a 5-minute detailed version to adapt to different audience interests.
- Practice makes perfect! We recommend running your presentation by your mentor or friend a couple of times before presentation day to work through any difficult points.
- Engage Your Audience: Stand beside your poster for visibility and maintain eye contact when explaining your research.
- Guide viewers through your visuals, define key terms, and highlight main conclusions.
- Point to diagrams when relevant and do your best to remain aware if any confusion arises.
- Be Confident and Enthusiastic: Express passion for your research and maintain a positive presence! You’ve worked really hard, you got this :)
Design Tips
- Use a simple, light-colored background with dark text for contrast and readability.
- Limit text to around 800 words—let visuals and graphics communicate key points.
- Maintain legibility (body text ≥ 24 pt, subheadings ≥ 36 pt, author names ≥ 56 pt, title ≥ 72 pt).
- Use high-resolution images (150 dpi or higher) to ensure clear printing.
- There are many free image enhancers available that are only a Google search away.
- Proofread multiple times and seek (peer/mentor) feedback before finalizing.
- NOTE: Consider your color choices carefully. Here’s a great guide on color combinations that enhance accessibility for individuals with visual impairments. More info here.
Essential Poster Elements
Title, Authors, and Affiliations
- Use a clear and concise title in a large font (Recommendation: 72 pt or larger if possible).
- Be creative and make it interesting!
- List all contributors, including yourself, mentors, and collaborators.
- Include institutional affiliations beneath the author names
- Ex: Department Names and/or additional Institutions/Organizations Involved
Background
- Summarize your research topic, its significance, and the gaps it addresses.
- You can reference previous literature, but this is not necessary.
- Clearly state your research question or hypothesis—bold it if necessary for emphasis.
- You can even make this its own section!
Methods
- Keep text minimal—use diagrams, flowcharts, or illustrations instead of long descriptions.
- Ensure that methods are accessible to both specialists and non-specialists.
- BioRender and Canva are both great, free resources that have discipline specific graphics to enhance your diagrams but are useful for all disciplines
Data Representation
- Present findings through well-labeled charts, graphs, or tables.
- Choose appropriate formats for numerical data (tables vs. graphs) for clarity.
- Label axes, legends, and headings clearly for readability.
- Consider your color choices carefully. Here’s a great guide on color combinations that enhance accessibility for individuals with visual impairments.
Conclusions & Future Work
- Summarize key takeaways and how they relate to your research objectives.
- Suggest possible future experiments, directions or applications based on your findings.
Acknowledgments & References
- Acknowledge those who supported your research, including mentors and funding sources (including URCA if your works was funded through URCA or FRAP grants).
- List references in the appropriate citation format at the bottom of your poster.